background

Showing posts with label Christmas. Show all posts

Thursday, September 1, 2016

CTMH Flower Market Cricut Cartridge and New Papers!


No, this is not a repeat of a recent post, I just wanted to highlight  the other products I used to create this card. Everything except the stamp is from Close To My Heart!  What did you say? You haven't seen this gorgeous paper yet? That's because it just became available today in our new Holiday Expressions Idea Book!
The paper is Swan Lake and you are going to love all the beautiful Fall creations you will be able to make with this paper pack. Be sure you take a look at my CTMH website where you will also find our gorgeous new Christmas papers and the new mini City Sidewalks Digital Cricut Cartridge!!

Speaking of Cricut cartridge, I cut the flowers and wreath on this card with the amazing Flower Market Cartridge from CTMH. You will love every one of the 700 images on this cart!


Wednesday, October 21, 2015

Inspired Stamps Panel Card


We are bringing you Christmas Cards this week at Inspired Stamps. I decided to share a panel card using the precious Nativity Stamp Set.

I cut a 6x12 white sheet of cardstock and then scored and folded every 3 inches. I then cut and adhered the banner pieces on each panel. To continue the shiny gold look, I used gold embossing powder on each stamped image and then ran the edges of their mats through Versamark ink and embossed with the gold powder. I love it so much I may have to make more before the big day!


Wednesday, December 17, 2014

From Leftovers to Tag

I am sharing a tag made with an Inspired Stamps His Little Ones and Hymn Line Wings stamp today but you might be surprised to learn that every piece came from my "leftover jar". 

The moment you start crafting, you will find you have bits and pieces left over. Then you feel guilt about wasting $ if you throw them away. To solve the dilemma, I keep a jar on my desk that I throw the bits in to.  I let it fill up and when it won't hold another thing, I dump it out and start making tags, cards, etc.

The stamped image was one I deemed "unworthy" for a card because I didn't like how her face turned out after adding too many freckles. But she's perfect for a gift tag that will be barely glanced at as the recipient rips it off with the wrapping paper! The Hymn wings were just extras from a day of card making. The tag, trim and tinsel were also in the leftover jar. I wanted to stamp a word on the bottom of the tag but was limiting myself to a strictly "leftover" project.  The recipient's name could be written at  the bottom as well.

Please look at the rest of the Design Team's creations at the Inspired Stamps Blog!
  Have a Merry Christmas!

Wednesday, December 3, 2014

Inspired Stamps Christmas His Little Ones


I blinked and it's December! How about you? Thanksgiving was a lovely time but now I'm ready to enjoy the few fleeting days of Christmas festivities.  Today I am sharing one of the sweet His Little Ones stamp from Inspired Stamps.  This is the outside of the card and I have used a sentiment stamp from another favorite Christmas stamp set, Nativity Set

The inside of the card uses a scripture from the beautiful Poinsettia Stamp Set. I hope you enjoy this Holy season! Next week I will share an inspirational gift you can make that will encourage someone throughout the year.


Friday, November 14, 2014

Inspired Stamps Waterfall Tutorial


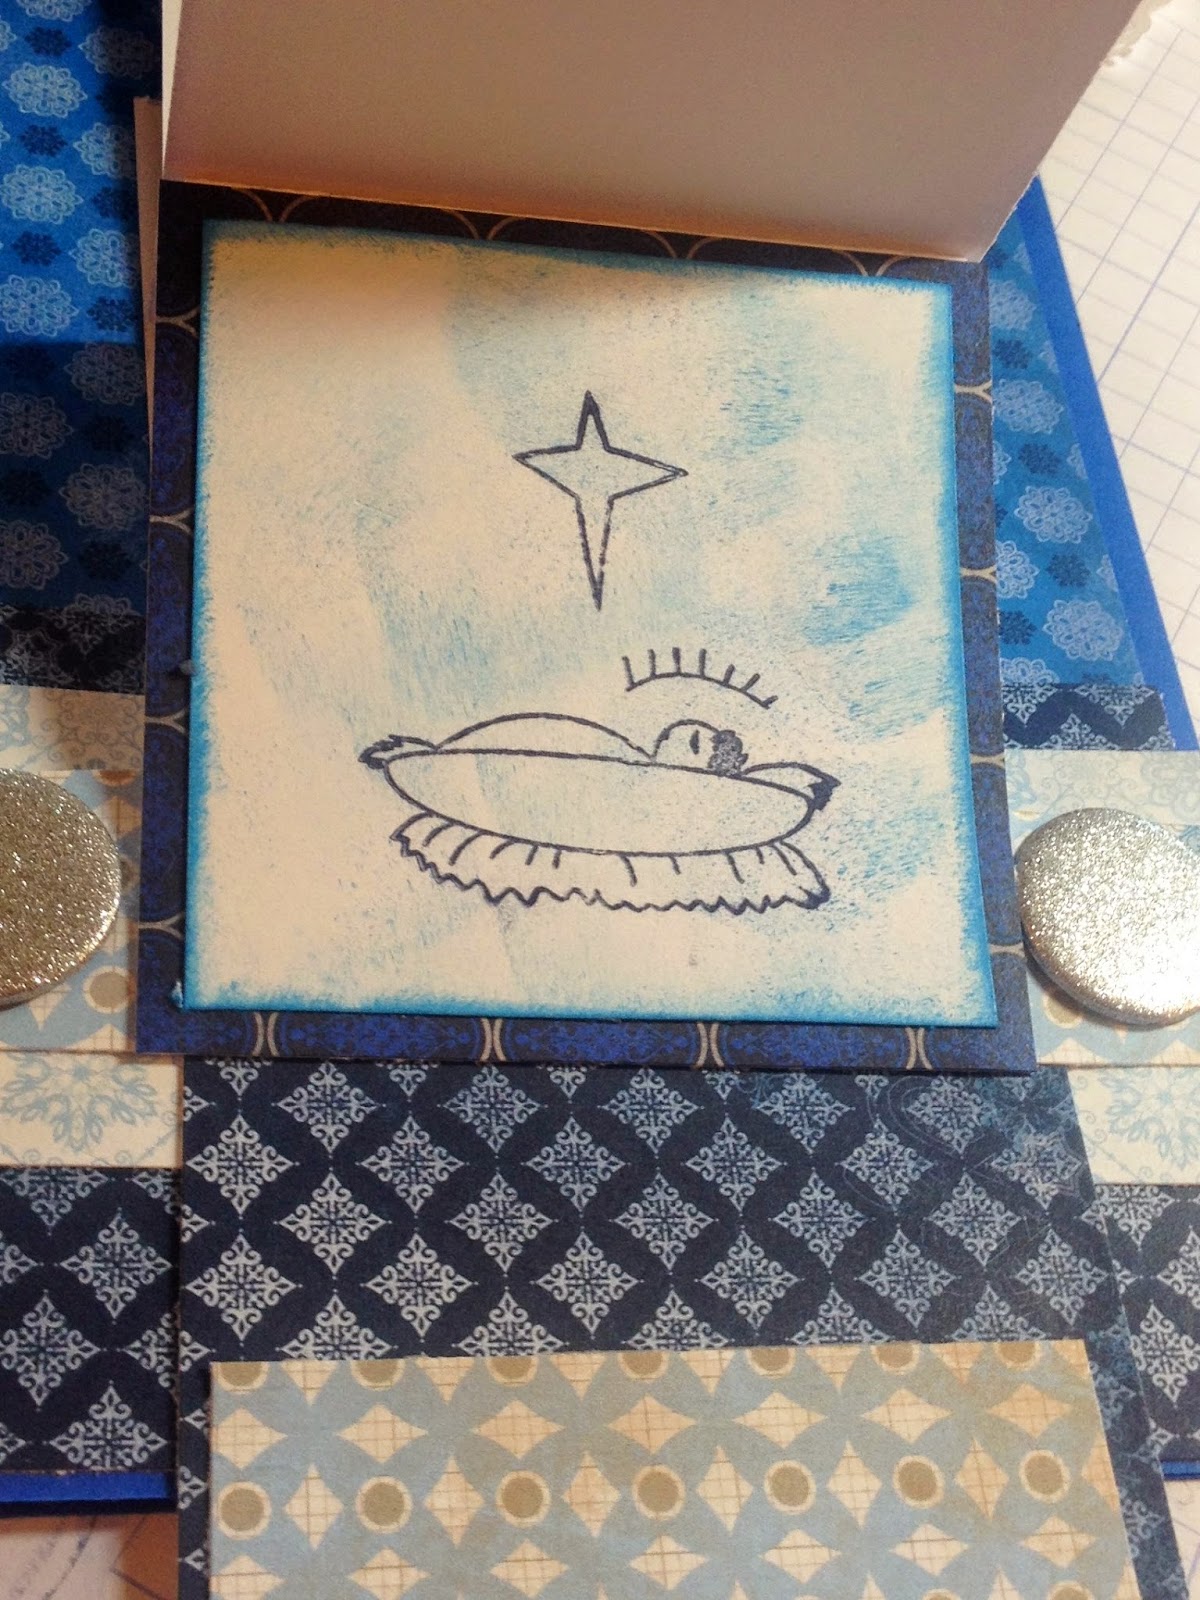
Today I am sharing a tutorial on a waterfall card using Inspired Stamps sweet Nativity set. Because the cutting and folding takes a little time, I kept the stamping very simple. I used to think this had to be  really difficult card to do found it's actually quite simple.

My card is 5x7 so start with a base of 10x7 folded in half.  You will also need 4 squares for your mats cut at 3x3 and 4 plain squares of 2 3/4"x2 3/4". I then used a light touch with a sponge to add color to the white squares and then inked the edges darker.  After they were all inked, I used a dark blue to stamp the images.
 Adhere each of the stamped images onto a mat.


Next cut a plain cardstock strip to 2 3/4" x 12". Then score the strip at 3", 3 3/4", 4 1/2" and 5 1/4". Fold on the score lines-as shown (all mountain folds).  
 Choose your bottom image and adhere it to the 2 3/4' square left from the 1st fold.

Pay close attention for the next image to only put adhesive on the strip, then carefully line up next image square over adhesive and right next to fold-not over or under it. Continue with last 2 squares.


I adhered coordinating cardstock to the bottom inside flap of my strip. Now cut a coordinating strip of cardstock 1"x5" and another 2"x5".  Center and adhere 1" piece to the edge of back of bottom square.
Attach ends of 1" piece over 2" piece with brads-NO adhesive


 Use adhesive on back of 2x5" piece and  adhere only to your card front approx 3/4' from bottom of card front.. The back of your waterfall strip should NOT be attached or glued to anything.  Slide it between your 1" and 2" strips between the brads. it becomes your pull "tab"


Wednesday, November 5, 2014

Inspired Stamps November Release


Isn't she sweet? Meet Inspired Stamps new Hymn Girl. Available on the on-line store's NEW location: https://www.etsy.com/shop/GodblessyourART . With this move, shipping costs will go DOWN!

She is ready to trim the tree and hang the stockings.  An assortment of gift boxes, stockings and ornaments are included in this set to place in her hands.  I wish you could see the sparkle of this card! Be sure to see the other cards and new stamps on the Inspired Stamps Blog.

Thursday, September 25, 2014

Christmas Showcase at Inspired Stamps


This card is so much better in person.  It just was difficult to photograph! This is my last post for the 30 Days of Christmas Showcase at Inspired Stamps but there will be 3 more days of cards at the IS Blog and 3 more days to purchase Christmas stamps on SALE!


This card was fun to put together! I started with a red base and then "sandwiched" together a background paper, acetate and the glitter paper.  Before sealing it all closed, I attached the HLO:Christmas Girl and sprinkled in some glitter. The sentiment is from Christmas Poinsettia.

Thursday, September 18, 2014

30 Days of Christmas Showcase w/Inspired Stamps


I hope you have been visiting the Inspired Stamps Blog all month for the beautiful Christmas Inspiration. Here is another card I've made this month.  I used the adorable HLO: Winter Boy stamp as well as my favorite verse from New Blessed Little Christmas.

Have you checked out the sale prices on the fabulous Christmas stamps at Inspired Stamps?

Thursday, September 11, 2014

Inspired Stamps 30 Days of Christmas Showcase


Back today with another Christmas card for you using Inspired Stamps.  Christmas is my favorite time of year! It is filled with so much hope and joy because of the world changing event it commemorates!  What better time to use scripture in your creations? 

When making your cards, you can get several done quickly when you take a few shortcuts.  For this card, I used 3 "Picture Your Life" pre-made cards and pre-made flowers to highlight the scripture and sentiment.  As well, the gold card base is a pre-made card I purchased from after-Christmas clearance.


The verse is from Christmas Poinsettia and the circle stamp is from 1.5" Circle Christmas.There is a Sale on ALL CHRISTMAS STAMPS all September long so be sure to stock up now for all your creating needs at www.inspiredstamps.com. Also, there is a new Christmas card on the Inspired Stamps Blog every day this month!


Monday, September 1, 2014

Christmas Card Showcase

Welcome to the 1st day of Inspired Stamps' Christmas Card Showcase! For the next 30 days you can find inspiration for Christmas card creations at Inspired Stamps. For my card, I used my very favorite snowman from the  Snowmen set as well as 1 of the sentiments from the versatile  1.5" Circle Greetings. I stamped the snowman on super fine glitter paper and then used Copics to color the details.


On the inside, I stamped the snow-woman and the 2x2 Scripture stamp, Matthew 1:21 

Be sure you don't miss a single beautiful creation by the rest of the Design Team:

Thursday, July 31, 2014

Christmas Scripture Card

On this final day of July,  we are actually enjoying much cooler temps than normal in Texas. Maybe not Christmas temps, but close enough! So, before we leave this unusually cool summer day for a hot August, I wanted to share a Christmas card using Inspired Stamps. The wisemen stamp is from the Vintage Christmas set and the scripture is from the Poinsettia stamp set.

Be sure to check out the great prices on Christmas stamps and others that are on sale through today at Inspired Stamps.


Thursday, July 24, 2014

Christmas in July Blog Hop


Five months and counting down! Yes, I'm talking Christmas,  people!The girls of Inspired Stamps are here to give you the inspiration to get a head start on your Christmas cards. 

 I used ONE stamp set to create 3 fun Christmas Chalkboard cards.  The very versatile Snowmen Stamp Set comes with so many stamps-I didn't even use them all!  Bonus-all the Christmas stamps are on sale today at Inspired Stamps!

I once again turned to the "sandwich board" style card and turned them into chalkboards by using chalkboard cardstock and white pigment ink.

Your next stop on the hop is Jamie's fabulous creation.


Thursday, November 14, 2013

Inspired Stamps Tutorial Using Stamping Gear


If you are like me, you always want to try out the latest gadgets in stamping.  I had a coupon
(of course) and purchased a Stamping Gear set.  However, I did not love the stamps that came with it after trying it out.  Lucky for me, I discovered I could use my Inspired Stamps with it instead!


For this example, I used the poinsettia stamp from the beautiful Christmas Poinsettia stamp set. For this card, it didn't matter that the stamp did not fit on the paddle perfectly.

 I started in a center slot and repeated on all sides. Then I stamped in the 4 corner slots.

This is the result and it could be used to frame a photo on a scrapbook page. 

But I used it as a mat on my card front and in order to do that, I cut it down to fit my card.

A few drops of gold Stickles and a wonderful scripture from the Vintage Christmas Stamp Seand I've completed another Christmas card for a loved one.